Steam Community Guide All Cg Art Galleries
| | This page is an image gallery. It contains various images based on the topic of the main commodity. As such, please proceed with caution as some images may incorporate spoilers. |
| |
| IMAGE GALLERY Clean-UP This gallery is missing some of import images! You can help Danganronpa Wiki by adding it! |
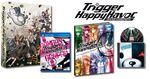
Physical Media Covers
Game Comprehend Art
Standard
")
")
Europe
(Vita)

Commonwealth of australia
(Vita)
")
Deutschland
(Vita)
")
Taiwan
(Vita)
Digital
![]()
iOS/Android Icon
![]()
")
Nintendo e-Shop promo art
(English)
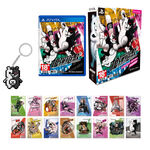
Special Editions
")
Nihon "PSP the Best" Re-Release
(PSP)

Nihon
("Best of" PSP)
Due north America; NISA
(Vita)
Taiwan
(Vita)
Soundtrack Fine art
In-Game CG Illustrations
Game Introduction
")
Sakura Ogami & Aoi Asahina
.png (2.25 MB)")
Yasuhiro Hagakure & Mukuro (Junko Disguise)
")
Makoto Naegi
")
Makoto Naegi
")
Leon Kuwata & Sayaka Maizono
")
Chihro Fujisaki & Kiyotaka Ishimaru
")
Kyoko Kirigiri & Celestia Ludenberg
")
Monokuma
")
Monokuma
")
Byakuya Togami & Toko Fukawa
")
Hifumi Yamada & Mondo Owada
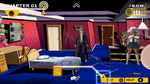
Prologue
.png (518 KB)")
Prologue card
")
")
")
 (1).png (388 KB)")
Cyberspace forums virtually the incoming Ultimate students
 (2).png (91 KB)")
Cyberspace forums virtually the incoming Ultimate students
")
")
Leon hitting a baseball
")
Junko on her style magazines
")
Mondo riding with his biker gang
.png (535 KB)")
Makoto'due south acceptance letter of the alphabet to Hope's Peak Academy
.png (584 KB)")
Makoto waking up
.png (582 KB)")
Makoto waking up
")
The students gathered at the school entrance
")
Monokuma ordering everyone to the gym over the monitors
")
Monokuma announcing the mutual killing game
")
Mondo grabbing Monokuma
")
Mondo throwing an exploding Monokuma
")
The start of the Killing School Life
.png (127 KB)")
Prologue terminate
Surviving Students
(Prologue)
Chapter i
.png (414 KB)")
Chapter card
(Daily Life)
.png (360 KB)")
Affiliate bill of fare
(Deadly Life)
")
Sayaka knocked down afterwards running into Makoto
.png (817 KB)")
Morn meeting in the cafeteria
")
")
Makoto's family in his motive video
")
Sayaka crying into Makoto afterward watching her motive video
")
Sayaka's corpse
")
Monokuma explaining the Form Trial
")
Monokuma announcement
.png (754 KB)")
Monokuma announcement monitor off
 stepping on Monokuma (1).png (658 KB)")
Mukuro stomping on Monokuma
 stepping on Monokuma (2).png (668 KB)")
Mukuro beingness impaled
 impaled.png (933 KB)")
")
Kyoko and Makoto investigating Makoto'south dorm room
.png (686 KB)")
.png (733 KB)")
Sayaka'southward idol group in her motive video
.png (738 KB)")
Sayaka'due south idol grouping in her motive video
.png (764 KB)")
Sayaka'south idol group in her motive video
.png (863 KB)")
Sayaka'southward idol grouping in her motive video
.png (560 KB)")
Sayaka's idol group in her motive video
.png (790 KB)")
Students in the lift to the Class Trial room
(Chapter 1)
.png (801 KB)")
The Form Trial begins
.png (699 KB)")
The Class Trial begins
.png (757 KB)")
The Class Trial begins
")
Sayaka'due south writing Leon's name in her blood
.png (562 KB)")
Leon found guilty
.png (768 KB)")
Leon found guilty
")
Leon reacting in horror after beingness voted the Blackened
Surviving Students
(Chapter 1)
.png (121 KB)")
Chapter one Finish
Closing Argument
")
Act i
")
Act 1
")
Deed 1
")
Deed two
")
Act two
")
Act 2
")
Act 3
")
Human activity 4
")
Act iv
")
Human activity 4
")
")
Leon Kuwata identified equally Sayaka Maizono's killer
Chapter 2
.png (586 KB)")
Chapter card
(Daily Life)
.png (571 KB)")
Affiliate card
(Deadly Life)
")
Monokuma hosting morning time exercises
")
Byakuya reading
")
Mondo and Kiyotaka's sauna endurance test
.png (559 KB)")
Monokuma's second motive: secrets
(English)
.png (431 KB)")
Chihiro'south corpse
(English)
")
Toko fearfully hiding herself in her dorm
.png (465 KB)")
.png (798 KB)")
Contents of the Genocide Jack case file
(English language)
.png (780 KB)")
Students in the elevator to the Class Trial room
(Affiliate 2)
.png (1.13 MB)")
Genocide Jack showing off her special pair of scissors
")
Celestia running into Chihiro in the supply room
")
Chihiro decision to dress like a girl
.png (637 KB)")
Mondo institute guilty
.png (756 KB)")
Mondo constitute guilty
.png (906 KB)")
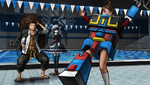
Daiya and Mondo'south final race
.png (975 KB)")
Daiya and Mondo'southward last race
.png (686 KB)")
Daiya and Mondo'south final race
.png (654 KB)")
Daiya and Mondo'south final race
.png (681 KB)")
Daiya and Mondo'south final race
")
Monokuma meeting with his mole in secret
.png (127 KB)")
Chapter 2 Cease
.png (216 KB)")
Surviving Students
(Chapter ii)
Closing Argument
")
Human activity 1
")
Act 1
")
Human action 2
")
Human action 2
")
Act 3
")
Act 3
")
Act three
")
Act 4
")
Act 4
")
Act 4
")
Human action 5
")
")
Mondo Owada identified every bit Chihiro Fujisaki'south killer
Chapter 3
.png (547 KB)")
Chapter bill of fare
(Daily Life)
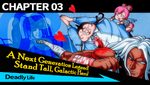
Chapter card
(Mortiferous Life)
")
Aoi crying over all of the deaths
.png (696 KB)")
Aoi seeing Change Ego for the first time
")
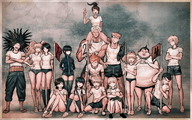
Group photo of
Mondo, Leon, and Chihiro
")
Man's Fantasy
bonus bath scene
")
Monokuma'due south third motive: money
.png (702 KB)")
Photo of Hifumi dragging Yasuhiro away in the Robo Justice costume
")
Hifumi playing dead
Kiyotaka's corpse
(Outset discovery)
")
Discovering Kiyotaka's corpse and Hifumi's dying form
.png (502 KB)")
Aoi cradling a dying Hifumi
.png (275 KB)")
Aoi cradling a dying Hifumi
.png (271 KB)")
Aoi cradling a dying Hifumi
.png (466 KB)")
Aoi cradling a dying Hifumi
.png (462 KB)")
Aoi cradling a dying Hifumi
.png (583 KB)")
Aoi cradling a dying Hifumi
Aoi trying on the Robo Justice arrange
(English)
.png (753 KB)")
Students in the elevator to the Class Trial room
(Chapter 3)
.png (549 KB)")
Celestia found guilty
.png (735 KB)")
Celestia found guilty
")
Celestia's dream
")
Makoto beingness assaulted by the mastermind in disguise
.png (516 KB)")
Sakura fighting Monokuma
.png (750 KB)")
Sakura fighting Monokuma
.png (458 KB)")
Sakura fighting Monokuma
.png (310 KB)")
Sakura fighting Monokuma
.png (490 KB)")
Sakura fighting Monokuma
.png (44 KB)")
Sakura fighting Monokuma
.png (1,011 KB)")
Sakura against Monokuma
")
Yasuhiro's alien claim
.png (139 KB)")
Chapter iii Finish
.png (217 KB)")
Surviving Students
(Chapter 3)
Endmost Argument
")
Act 1
")
Act two
")
Act 2
")
Act three
")
Act 3
")
Human activity 4
")
Act v
")
Act five
")
Act v
")
Act 5
")
")
Celestia Ludenberg identified equally the organizer of Kiyotaka Ishimaru and Hifumi Yamada's murders
Chapter 4

Chapter carte du jour
(Daily Life)
.png (399 KB)")
Chapter card
(Deadly Life)
")
Group photo of
Celestia, Sayaka, and Hifumi
")
Aoi slapping Byakuya
")
Genocide Jack injuring aoi
")
Sakura's corpse in the Rec Room
")
Sakura's corpse
.png (339 KB)")
Sakura's corpse
.png (676 KB)")
The others finding Sakura'south corpse
")
Missing rec room Monokuma bottles
.png (432 KB)")
Weighting the Monokuma bottle pieces
.png (477 KB)")
Weighting the Monokuma canteen pieces
")
Byakuya's drawing of the chem lab
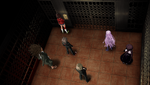
Students in the lift to the Class Trial room
(Chapter 4)
.png (571 KB)")
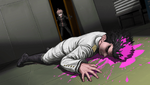
Sakura bleeding
.png (1.43 MB)")
Sakura haemorrhage
")
Sakura being attacked past Yasuhiro
")
Byakuya drinking the protein liquid to testify it'due south not poison
.png (536 KB)")
Sakura found guilty
.png (745 KB)")
Sakura found guilty
")
Sakura writing her suicide note
")
Kyoko waking upward Makoto
")
Kyoko whispering to Makoto nearly the 16th educatee:
Mukuro Ikusaba
.png (127 KB)")
Affiliate 4 Stop
Surviving Students
(Chapter four)
 (2).png (547 KB)")
Surviving Students
(Affiliate iv)
Endmost Argument
.png (461 KB)")
Human action 1
.png (393 KB)")
Act 2
.png (607 KB)")
Deed three
.png (817 KB)")
Deed three
.png (633 KB)")
Deed iii
.png (622 KB)")
Human activity 3
.png (720 KB)")
Act 3
.png (628 KB)")
Act v
.png (634 KB)")
Act 6
.png (545 KB)")
Deed 6
.png (399 KB)")
.png (615 KB)")
Aoi Asahina identified as the person who tampered with the scene of Sakura Ogami's death
.png (596 KB)")
Aoi Asahina identified every bit the person who tampered with the scene of Sakura Ogami's expiry
Affiliate 5
.png (488 KB)")
Chapter carte du jour
(Daily Life)
.png (556 KB)")
Affiliate bill of fare
(Deadly Life)
.png (863 KB)")
Makoto with a fever in bed
.png (866 KB)")
Makoto with a fever in bed
.png (776 KB)")
Makoto with a fever in bed
.png (775 KB)")
Makoto with a fever in bed
")
The mastermind in disguise almost to assault Makoto
")
Toko, Aoi, Byakuya, and Yasuhiro dismantling an inactive Monokuma
")
Mukuro'due south corpse
.png (774 KB)")
Mukuro's booby trapped corpse exploding
.png (504 KB)")
Putting out the burn on Mukuro'due south corpse
.png (650 KB)")
Putting out the fire on Mukuro's corpse
")
Screens of the schoolhouse in the information room
.png (701 KB)")
The students seeing themselves on screen
.png (623 KB)")
The students seeing themselves on screen
.png (305 KB)")
Makoto reading Mukuro's class profile
")
Makoto and Byakuya reading about Fenrir
Students in the lift to the Class Trial room
(Chapter 4)
.png (546 KB)")
Makoto found guilty
.png (742 KB)")
Makoto establish guilty
Surviving Students
(Affiliate 5)
.png (133 KB)")
Affiliate 5 End
Chapter 6
.png (479 KB)")
Chapter card
(Deadly Life)
.png (516 KB)")
Makoto and Kyoko climbing the trash room ladder
.png (825 KB)")
Makoto and Kyoko climbing the trash room ladder
")
The others happy to see Makoto alive
")
Jin Kirigiri's computer password screen
")
Jin Kirigiri's remains
Photo of
a immature Kyoko and Jin
 (1).png (465 KB)")
Makoto reading pre-game Kyoko'southward pocketbook
Makoto reading pre-game Kyoko's pocketbook
(English)
.png (554 KB)")
Sayaka'south interview with Jin
.png (572 KB)")
Makoto's interview with Jin
.png (558 KB)")
Byakuya's interview with Jin
.png (520 KB)")
Toko'southward interview with Jin
.png (542 KB)")
Aoi'southward interview with Jin
.png (582 KB)")
Kyoko's interview with Jin
.png (480 KB)")
.png (459 KB)")
Grouping photo of
Class 78th
Group photo of
Grade 78th
Grouping photograph of
Course 78th
")
Kyoko revealing her damaged hands
 (1).png (485 KB)")
 (2).png (560 KB)")
Junko revealing herself every bit Ultimate Despair
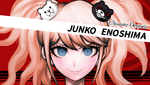
Junko revealing herself as Ultimate Despair
(English)
.png (454 KB)")
.png (738 KB)")
The Tragedy
.png (779 KB)")
The Tragedy
.png (600 KB)")
The Tragedy
.png (586 KB)")
The Tragedy
")
The Despair Sisters
.png (540 KB)")
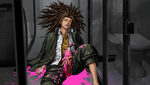
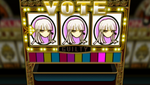
Junko establish guilty
.png (729 KB)")
Junko found guilty
.png (525 KB)")
.png (509 KB)")
Junko thrilled for her execution
.png (555 KB)")
Junko thrilled for her execution
.png (704 KB)")
Junko thrilled for her execution
.png (135 KB)")
Chapter 6 Finish
Closing Statement
")
Act 1
")
Act 2
")
Act 3
")
Act 4
")
Human activity 4
")
Human activity five
")
Deed 5
")
")
Junko Enoshima identified as the mastermind of the Killing School Life
Epilogue
.png (585 KB)")
Epilogue card
")
The survivors of the Killing School Life at the door
.png (599 KB)")
Makoto pressing the escape button
.png (595 KB)")
Makoto pressing the escape button
.png (370 KB)")
The survivors of the Killing Schoolhouse Life escaping
.png (245 KB)")
The survivors of the Killing Schoolhouse Life escaping
.png (695 KB)")
Monokuma still agile
.png (716 KB)")
"I am your--I am this school's...headmaster!"
Alternate Endings
 (1).png (609 KB)")
Anybody escapes
 (2).png (441 KB)")
Everyone escapes
Kyoko found guilty
(Bad Ending; Chapter 5)
.png (729 KB)")
Kyoko found guilty
(Bad Ending; Chapter v)
Bad Catastrophe
(Chapter v)
Other
 (1).png (349 KB)")
To Be Continued
End Menu
 (2).png (337 KB)")
To Be Continued
Stop Menu
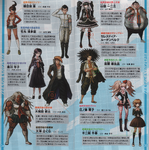
Concept Art Gallery
Design Profiles
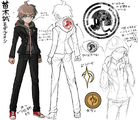
Makoto Naegi
blueprint sketches
")
Kiyotaka Ishimaru
design sketches
")
Byakuya Togami
pattern sketches
")
Mondo Owada
design sketches
")
Leon Kuwata
pattern sketches
")
Hifumi Yamada
pattern sketches
")
Yasuhiro Hagakure
design sketches
Sayaka Maizono
design sketches
")
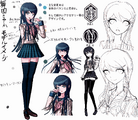
Kyoko Kirigiri
design sketches
")
Aoi Asahina
design sketches
Toko Fukawa
design sketches
")
Genocide Jack
pattern sketches
")
Sakura Ogami
design sketches
")
Celestia Ludenberg
design sketches
")
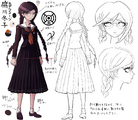
Chihiro Fujisaki
design sketches
")
Mukuro Ikusaba
pattern sketches
")
Junko Enoshima
design sketches
")
Monokuma
design sketches
")
Robo Justice
design sketches
Analogy Art
")
Makoto Naegi
analogy
Kiyotaka Ishimaru
illustration
")
Byakuya Togami
illustration
")
Mondo Owada
illustration
")
Leon Kuwata
illustration
Hifumi Yamada
illustration
")
Yasuhiro Hagakure
illustration
Sayaka Maizono
illustration
")
Kyoko Kirigiri
illustration
Aoi Asahina
illustration
")
Toko Fukawa
illustration
Genocide Jack
illustration
")
Sakura Ogami
illustration
")
Celestia Ludenberg
analogy
")
Chihiro Fujisaki
analogy
 Rui Komatzusaki Analogy.png (808 KB)")
Mukuro Ikusaba (Disguise)
illustration
Junko Enoshima
analogy
")
Monokuma
illustration
")
Kenshiro
illustration
")
Santa Shikiba
analogy
")
Kiyondo
illustration
")
Mukuro Ikusaba
illustration
Concept Art
")
Makoto Naegi
concept art
")
Kiyotaka Ishimaru
concept fine art
")
Byakuya Togami
concept art
")
Mondo Owada
concept art
")
Leon Kuwata
concept fine art
")
Hifumi Yamada
concept art
")
Yasuhiro Hagakure
concept fine art
")
Sayaka Maizono
concept art
")
Kyoko Kirigiri
concept art
")
Aoi Asahina
concept art
")
Toko Fukawa
concept art
")
Sakura Ogami
concept art
")
Celestia Ludenberg
concept art
")
Chihiro Fujisaki
concept fine art
.png (306 KB)")
Mukuro Ikusaba (Disguise)
concept art
Monokuma
concept art
Execution Concept Art
Pixels for executions
concept art
")
Leon execution
concept art
")
Mondo execution
concept fine art
Celestia execution
concept art
.png (524 KB)")
Alter Ego execution
concept art
.png (947 KB)")
Change Ego execution
concept art
Junko execution
concept art
")
Kyoko and Makoto execution
concept fine art
Early Concept Art
")
Leon and Sayaka
early concept art
")
Leon and Sayaka
early concept art
Monokuma
early concept art
.png (394 KB)")
Monokuma
early concept art
.png (379 KB)")
Monokuma
early concept fine art
.png (270 KB)")
Monokuma
early on concept art
")
Sakura Ogami
early concept art
In-Game Art Avails
Chips
art assets
")
"Mondo Butter"
art avails
Princess Piggles
art assets
Promotional Illustrations
.png (903 KB)")
Media Land
pre-order incentive
")
Dengeki Games
book thirteen illustration
.png (770 KB)")
Dengeki Games volume 15 illustration
Dengeki Games book 15 analogy
.png (923 KB)")
Imagine
pre-club incentive
.png (1.19 MB)")
Miscellaneous Art
")
Sakura KOing Hifumi
unused concept art
Group illustration
bonus fine art
Promotional Artwork
Pre-Release Material
Promotional Stills (Steam)
 (1).jpg (483 KB)")
Promotional Nevertheless
(English)[1]
 (2).jpg (511 KB)")
Promotional Still
(English)[i]
 (three).jpg (324 KB)")
Promotional Still
(English)[1]
Promotional Nonetheless
(English)[1]
Promotional Still
(English)[i]
Promotional Still
(English)[ane]
 (seven).jpg (494 KB)")
Promotional However
(English)[1]
 (8).jpg (537 KB)")
Promotional Yet
(English)[1]
 (9).jpg (397 KB)")
Promotional Still
(English)[1]
Promotional Stills (iOS/Android)
Promotional Yet
(English language)[2] [3]
 (2).png (273 KB)")
Promotional Still
(English)[2] [3]
Promotional Still
(English)[2] [3]
 (4).png (2.89 MB)")
Promotional Still
(English)[2] [3]
 (5).png (ii.82 MB)")
Promotional Still
(English)[2] [3]
Promotional Notwithstanding
(English language)[two] [3]
Game Logos
![]()
(SOURCE NEEDED)
(Japanese)
![]()
(SOURCE NEEDED)
(English)
![]()
(SOURCE NEEDED)
(English)
Other Promotional Collaborations
Steam
.png (112 KB)")
Ultimate Idol Concert
(Steam Trading Card)
.png (112 KB)")
Ultimate Idol Concert [Foil]
(Steam Trading Card)
.png (108 KB)")
Ultimate Reading Room
(Steam Trading Carte du jour)
.png (108 KB)")
Ultimate Reading Room [Foil]
(Steam Trading Carte du jour)
.png (125 KB)")
Ultimate Throttle
(Steam Trading Card)
.png (125 KB)")
Ultimate Throttle [Foil]
(Steam Trading Card)
.png (110 KB)")
Ultimate Plot Twist
(Steam Trading Bill of fare)
.png (110 KB)")
Ultimate Plot Twist [Foil]
(Steam Trading Menu)
.png (109 KB)")
Ultimate Sauna Showdown
(Steam Trading Card)
.png (109 KB)")
Ultimate Sauna Showdown [Foil]
(Steam Trading Card)
.png (135 KB)")
Ultimate Heroines
(Steam Trading Card)
.png (134 KB)")
Ultimate Heroines [Foil]
(Steam Trading Carte)
.png (79 KB)")
Ultimate Alien Abduction
(Steam Trading Card)
.png (80 KB)")
Ultimate Alien Abduction [Foil]
(Steam Trading Card)
.png (92 KB)")
Ultimate Terror
(Steam Trading Carte)
.png (93 KB)")
Ultimate Terror [Foil]
(Steam Trading Carte)
Ultimate Heroes
(Steam Trading Bill of fare)
.png (128 KB)")
Ultimate Heroes [Foil]
(Steam Trading Card)
.jpg (314 KB)")
Ultimate Idol Concert
(Artwork)
.jpg (266 KB)")
Ultimate Reading Room
(Artwork)
.jpg (297 KB)")
Ultimate Throttle
(Artwork)
Ultimate Plot Twist
(Artwork)
.jpg (328 KB)")
Ultimate Sauna Showdown
(Artwork)
.jpg (310 KB)")
Ultimate Heroines
(Artwork)
.jpg (267 KB)")
Ultimate Conflicting Abduction
(Artwork)
Ultimate Terror
(Artwork)
.jpg (285 KB)")
Ultimate Heroes
(Artwork)
.png (1 KB)")
:byakuya DGR:
.png (1 KB)")
:makoto DGR:
.png (1 KB)")
:sayaka DGR:
.png (1 KB)")
:kyoko DGR:
.png (1 KB)")
:monokuma DGR:
.png (16 KB)")
Badge
Freshman
.png (15 KB)")
Bluecoat
Sophomore
.png (15 KB)")
Badge
Junior
.png (8 KB)")
Badge
Senior
.png (14 KB)")
Badge
Graduate
.png (14 KB)")
Badge [Foil]
Headmaster
 (SM).jpg (204 KB)")
Background (SM)
Kyoko Kirigiri and Makoto Naegi
Groundwork (HD)
Kyoko Kirigiri and Makoto Naegi
Background (SM)
Sakura Ogami and Aoi Asahina
 (Hard disk).jpg (344 KB)")
Background (Hard disk drive)
Sakura Ogami and Aoi Asahina
 (SM).jpg (238 KB)")
Background (SM)
Toko Fukawa and Byakuya Togami

Groundwork (Hd)
Toko Fukawa and Byakuya Togami
 (SM).jpg (233 KB)")
Background (SM)
Mondo Owada and Kiyotaka Ishimaru
 (HD).jpg (302 KB)")
Background (HD)
Mondo Owada and Kiyotaka Ishimaru
Background (SM)
Monokuma
 (HD).jpg (263 KB)")
Background (HD)
Monokuma
Magazines & Other Scans
Other Scans
")
Danganronpa 1 Japanese PSP Booklet
Danganronpa 1 Japanese PSP Booklet
References
- ↑ one.0 1.one 1.2 1.3 1.4 1.v 1.vi one.7 i.8 store.steampowered.com: Trigger Happy Havoc/ Danganronpa: Trigger Happy Havoc Steam Listing
- ↑ 2.0 ii.1 two.2 ii.iii ii.4 2.5 apps.apple.com: Danganronpa: Trigger Happy Havoc App Store Listing
- ↑ 3.0 3.ane iii.2 three.iii three.iv 3.v play.google.com: Danganronpa: Trigger Happy Havoc Google Play Shop List
Source: https://danganronpa.fandom.com/wiki/Danganronpa:_Trigger_Happy_Havoc/Image_Gallery
0 Response to "Steam Community Guide All Cg Art Galleries"
Post a Comment